September 21, 2010

~ dem bones, dem bones ~

September 21, 2010

Things are getting SPOOKY around here.

Don't let those faces fool you! They are little monsters.


With Halloween just over a month away we though it would be the perfect time to introduce our re-vamped Argyle Skulls t-shirt.

This design has come a long way from the first hand cut stencil I made almost 2 years ago. Me and my x-acto knife did not enjoy the 2 hours it took to cut out the stencil. But now I have improved the design and stuck in on a silkscreen!!

(I can't express how happy I am that I will never have to hand cut another skull stencil. Woo Hoo!)
But seriously, 2 hours of cutting and blisters were worth it.


Now you can get your own spooky Argyle Skulls tee for your toddler! He'll be the coolest kid in pre-school.


Boy's Argyle Skulls toddler tee - Black


Boy's Argyle Skulls toddler tee - Orange


And you can personalize this shirt! Add your son's name to the back.  Just add the distressed name upgrade to your cart when you check out.

Savvy? 
Photobucket
Related Posts with Thumbnails

September 17, 2010

Make your own Laundry Detergent

September 17, 2010
How much do you spend on laundry detergent in a month?
How about a year?


The last bottle of detergent I bought was $13. It lasted me about a month.
1 bottle a month = $156 a year.  Yikes!


When I was a little girl my best friend's amazing mom always made her own laundry detergent.  I thought she was a magician because I far as I knew that stuff only came from the grocery store, and the grocery store got it from some factory far far away.

She would break out the lye, the rubber gloves, the whole sha-bang! She was a genuine domestic diva!


I'm not so good with making the soap from scratch. . . so I'll give you a recipe for laundry detergent that most of you can make right now.

And it is a lot easier than "make your own laundry soap" sounds. 


Baking Soda Laundry Detergent recipe:

1/2 bar of mild bar soap (I use Ivory. Fels Naptha also works Great!)
1 gallon hot water
1 cup baking soda  (not washing soda)
1/2 cup borax

(Please forgive the terrible pictures. These are from 2 years ago.  In digital years that's like 50 years old.)


1. Finely grate your 1/2 bar of soap.

 2. Put your soap and a little bit of water in a small sauce pan and melt over low/medium heat while stirring.

 3. Heat your gallon of water. Boiling water is optimal because it will dissolve the soap quicker. I use a canning pot. You can also heat the water and pour it into a bucket to mix.


 4. Add your melted soap. Stir well. Then add the baking soda and borax.  This is the fun part! Watch it foam as you stir.

I feel like a mad scientist. Or a witch.

Bubble Bubble Toil and Trouble


 5. Let it cool.  Stir occasionally as it is cooling down.


6.  Pour your concotion into a jug. Make sure there is some room left at the top. You are going to need that space for shaking.

This is what it looks like after it has sat for a day. The soap seperates from the water.

 7. Shake Well before each use. 
1/2 Cup per load. (1 Cup for heavily soiled or extra large loads)


It doesn't look like the stuff you buy in the stores but you know exactly what is in it. There are no dyes, perfumes, or chemicals added.  


How does it compare?  I have noticed that the homemade detergent performs just as good, and in some cases better than the $13 bottle I used to use. 
Your cost =  from .60 to 2.00 depending on your soap.

I have used it off and on for the past 3 years and I LOVE it!


Photobucket
Related Posts with Thumbnails

September 15, 2010

Sacrifice vs. Giving

September 15, 2010
Life changes so rapidly. Yesterday I was 16 and getting my drivers license and going to the homecoming dance with the football player I am now married to. Today I am driving my oldest son to preschool and teaching him how to write his name.

Being a mother is the most wonderful and difficult job out there. We have the important job of sacrificing of our time, energy, skills, (not to mention boat-loads of sleep) for these beautiful beings that God has entrusted into our care.

Then it hit me. 

Sacrifice? This isn't sacrifice!
I willing give my time, energy, skills, and sleep to my kids.  The word sacrifice is all wrong. It emphasizes that we really don't want to do it but we have to so we do it anyways.

The correct word is . . . Give

We give of ourselves to make their world a better place.


Giving is not just for the other person.  I have been taught this principle in church and at home my entire life but it never really sunk in until this past year.
You give to others to help them, and in the process you help yourself also.

It is amazing what giving can do to your physical, mental, and emotional health.

In a talk I was listening to today the speaker said that giving has Scientifically been proven to help you live longer. It also makes you a happier person.  AND, get this. . . . It is the worlds best diet plan!!


Yep, giving to others can actually help you lose weight!

Makes sense right?  We eat when we are upset, bored, sad, lonely. . . (at least I do)
When you are giving of yourself you rarely experience these emotions.  That's where the happiness kicks in.


I  have been touched by the lives of others who have served me, and those who have been my examples (Thanks Becki). 

So who's with me? Couldn't we all use some more happiness in our lives?
Let's give back in any way we can.  Volunteer, join a good cause, or even better : help your family, friends and neighbors! That's the best place to start.

My first order of giving. . .  Making bread for unsuspecting neighbors.  Photobucket
Related Posts with Thumbnails

September 9, 2010

Now it's Personal!

September 9, 2010
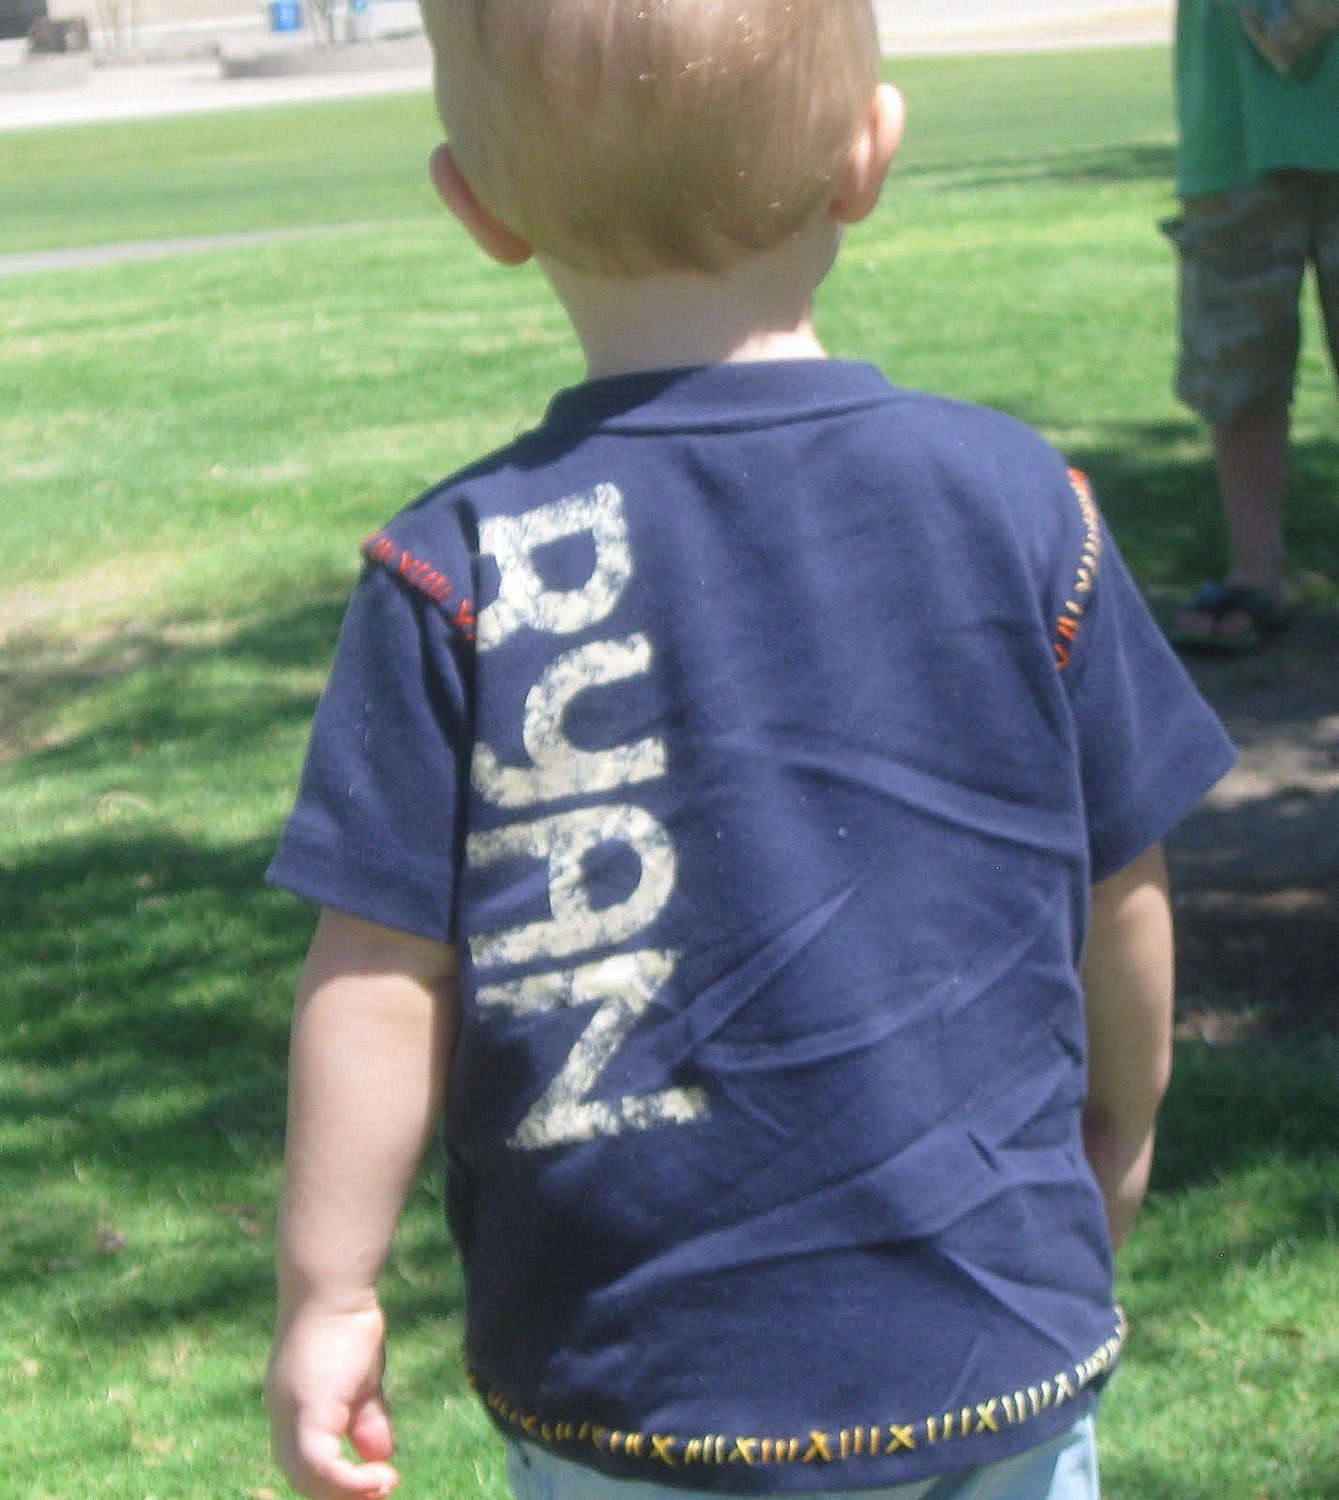
We celebrated Little Monster's b-day last week and I printed his very own personalized Choo Choo I'm 2 shirt with his name on the back!  And I added embroidery thread stitching on the sleeves and hem. (inspired by I am Momma Hear me Roar!)

I've been waiting SOOO long to use this design for my own kid!


I love the name on the back so much that I wanted to make personalized shirts available to you too!
 Oh Yeah!
You can have your child's name stencilled on the back of the shirt using this unique technique that makes it look distressed and faded.
It is also done with our gentle dye remover. No ink and no paint!

Just add this item to your cart along with the shirt you want to personalize.
(Perfect for birthdays!)


________________________________________________________________________________

For Ry's birthday I got to give my craft cutter a workout. But I thought it would be fun to make personalized invites for his party!


 I searched frantically though the internet to find the perfect train cupcakes and found nothing! So I had to improvise.
I cut cream cheese candies into cute little trains to top off the cupcakes. A little green grass and orange sprinkles and voila! you have Choo Choo cupcakes!
I'll have to share the cream cheese candy recipe! It's super easy, fun, and YUMMY!


Mmmmmm!


I also made a train pinata for the party. It is made out of cereal boxes, an oatmeal canister, a toilet paper roll, tissue paper, tape, and TONS of CANDY!!!!
After all my hard work on this thing I didn't even get a good picture. I guess this isn't one of those "I'll get pictures later" projects, because now it is smashed into pieces in a trash heap somewhere. But it was fun while it lasted! The kids were in candy heaven.  :)


Here's a picture I snapped while we were in the White Mountains for the party.
 It was so beautiful I had to share.

Have a sunny day!
Photobucket
Related Posts with Thumbnails
 
Blog Design by Eedee Design Studios