October 11, 2012

Fire Ombre Baby Bodysuit Tutorial

October 11, 2012

fire ombre 9 w logo


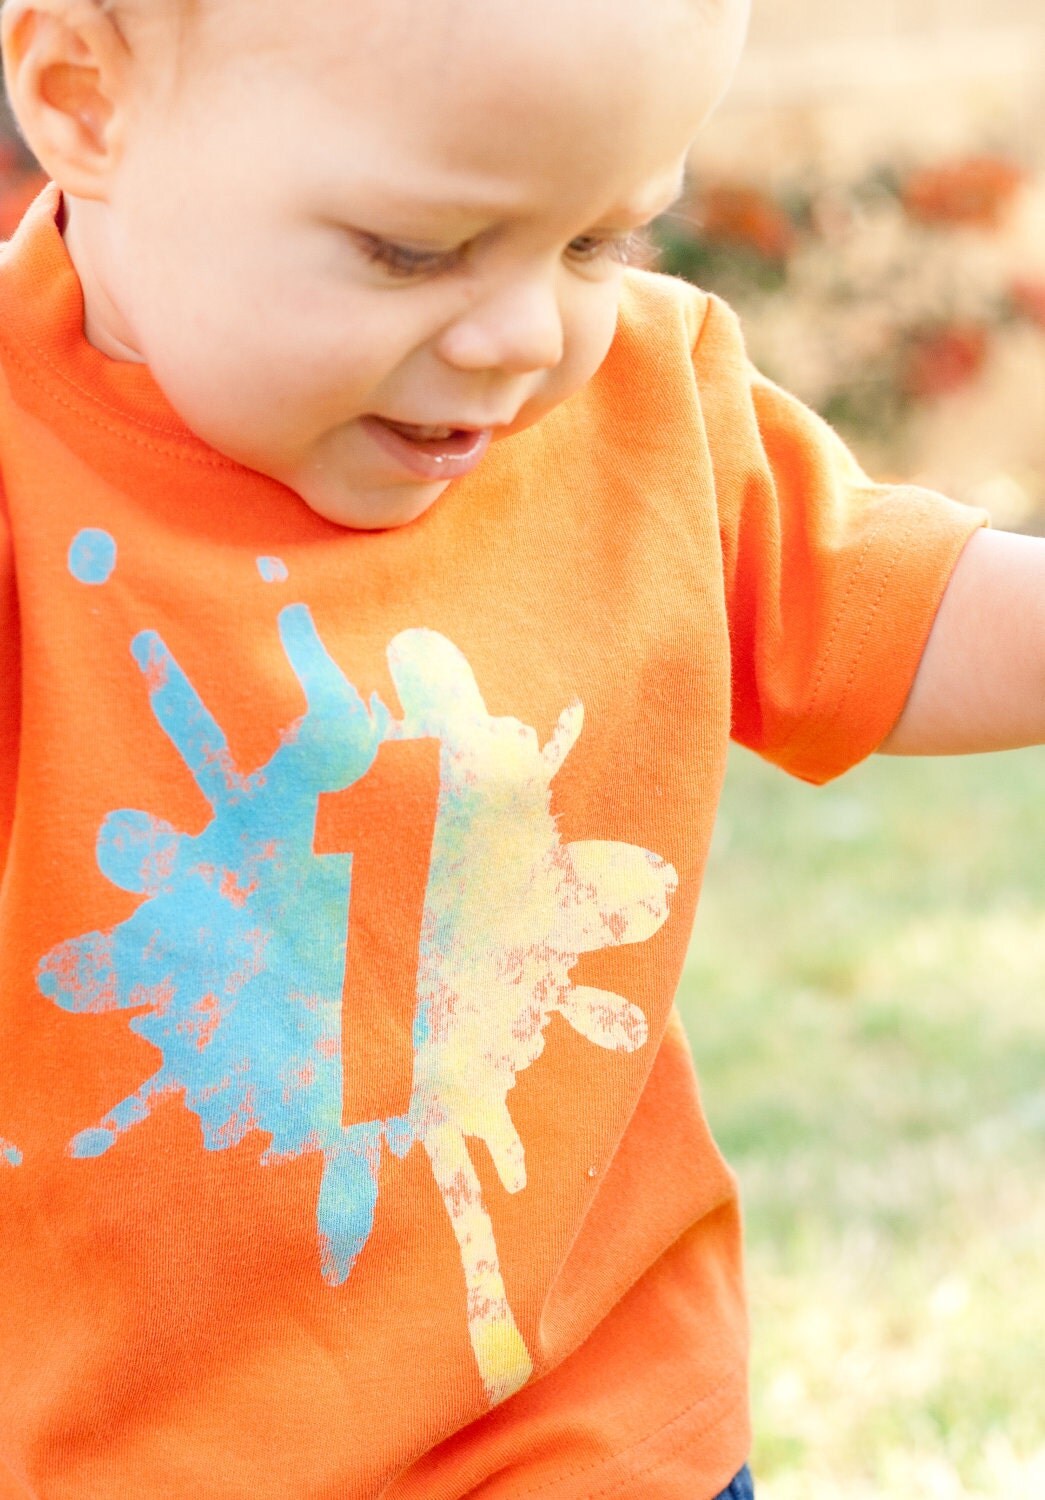
This little “onesie” is so hot it’s on fire!

This is simple to make and you can use the colors I chose or you can mix it up and create something totally unique.

Here’s what you need:

1. Baby bodysuit (a.k.a. “onesie”)

2. Fabric markers

3. newspaper, foam board, or something else to put inside of the bodysuit to prevent the markers from running through to the other side.

That’s it. Let’s get started. 

fire ombre 1

1. Pick out 3 markers that are similar in color or that can blend well from one to another. I chose Red, Orange, and Yellow for the fire effect.

fire ombre 2fire ombre 3

2. Start from the bottom and straight lines up from the bottom of the onesie. Try to keep them as straight as you can. Start with more lines at the bottom and thin them out a little the further up you go.

fire ombre 4

This is what the red layer looks like when it is done.

fire ombre 5

3. Do the same thing with the orange, overlapping the colors by a couple of inches so it gives the illusion that the red runs into the orange. Make the orange lines more dense in the middle and thin them out on the bottom and top so they blend well with the other colors.

fire ombre 6

4. Do the same thing with the yellow. This will be the top color so make at nice and even at the top.

fire ombre 7

4. When you are done with the front do the same thing on the backside, matching the placement of the layers so it looks cohesive with the front side.

fire ombre 8

5.You can also add a little flare to the sleeves.

6. Heat set the design if your markers require it. Check the instructions on your box of markers. These Crayola Fabric markers need to be heat set with a hot iron.

And you are done! Now go dress up your little fireball!

This is such an easy project. It requires only about 10-20 minutes from start to finish. This would be a great start to a “little devil” Halloween costume! Use your imagination and the possibilities go on for days!

Related Posts with Thumbnails

May 18, 2012

Chocolate Cherry Peanut Butter Bites

May 18, 2012

Choc cherry pb bites

These little bites are packed with flavor and nutrition. They are my favorite treat when I am craving some chocolate, which is always. The recipe is super easy and the result will have you swooning for this sweet and tangy dark chocolate confection.

Choc cherry pb bites 4

The best part is these these babies are naturally sweetened with fruit. Raisins and dried cherries make these bites sweet and tangy. And dark chocolate chips make them decedent and daringly delicious. I love chocolate so much I could marry it.


Chocolate Cherry Peanut Butter Bites

Ingredients:

1 C. Rolled Oats

1 T. Cocoa Powder (unsweetened)

1/3 C. Raisins

1/3 C Peanut Butter

1/2 C. Dark Chocolate Chips (I used Ghirardelli 60% Cacao chips)

1/2 C. Dried Cherries 


Method:

Measure out all of your ingredients into a food processor, I use my Ninja prep blender but a food processor works just as well. Process until there are no big pieces left. I usually process until the mixture looks uniform and sticks to the sides of the bowl.

Roll dough into bite sized balls and serve.

These bites can be stored in an airtight container in the fridge for one week, or maybe even longer. They haven’t lasted more than 2 days in our house.

Choc cherry pb bites 2

Related Posts with Thumbnails

May 7, 2012

Zucchini Brownies (with Healthy Chocolate Frosting)

May 7, 2012

Zucchini Brownies 3

My sister gave me a wonderful recipe for zucchini brownies that quickly became my favorite go-to semi-healthy dessert. But after swearing off white sugar and flour I had to say goodbye to my favorite brownies. boo hoo hoo.

But then I realized I am not powerless in this new no-sugar diet plan. So I grabbed a couple of bowls and zucchinis and made up a new recipe that I can enjoy (occasionally) without feeling guilty. And the frosting. . . oh man, I am so happy with how it turned out! Addicted? yes!

Zucchini Brownies 1

Zucchini Brownies:

Ingredients:

2T Olive Oil

1/4 C Unsweetened applesauce

3/4 C Evaporated Cane Juice (Sucanat) or Coconut Sugar

1 tsp. Vanilla extract

1 C Whole wheat flour

1/4 C Unsweetened cocoa powder

3/4 tsp. Baking soda

1/4 tsp. Sea salt

1 C Finely Shredded Zucchini


Directions:

Preheat oven to 350 degrees.

Grease 8x8 inch pan.

In a large bowl, mix together olive oil, applesauce, cane juice, and vanilla. In a separate bowl, combine whole wheat flour, cocoa, baking soda, and salt.  Add flour mixture to sugar mixture and mix well. The mixture will be kind of dry but don't add liquid to it. Trust me. Next, fold in the zucchini until everything is moistened and the mixture is consistent. It will still seem dry but the liquid will cook out of the zucchini in the oven so don't add any liquid.

Spread batter in pan and bake at 350 for 25-30 minutes.

Zucchini Brownies 7

Zucchini Brownies 6


Amazing Healthy Chocolate Frosting

1 Can of Coconut Milk (use a reliable brand like Thai Kitchen)

1 C Dark Chocolate Chips

1/2 tsp. Vanilla

3T Stevia in the Raw (or other dry sweetener)


Directions:

Place the can of coconut milk in the fridge overnight. Don't shake it up. Carefully open the can and scoop out the scrumptious coconut cream on top.

Zucchini Brownies 5Zucchini Brownies 4

Melt coconut cream and chocolate chips together over med-low heat, stirring occasionally. Once they are melted and mixed together into chocolate goodness, remove from heat and add vanilla and stevia.

Now you have to wait for the frosting to cool down so you you can put in in the fridge for about 3 hours or overnight. I put my frosting in the freezer for about 30 minutes to cool it down fast. Fluff up frosting with a fork or hand mixer and serve cold.

DO NOT let this sit out at room temperature or warmer because it melts much faster and easier that regular frosting. Keep it refrigerated until you are ready to use it and make sure your brownies are all the way cool before you frost them.

Zucchini Brownies 2

Watch them disappear.

Related Posts with Thumbnails

May 2, 2012

Feeling brand new {our new look, and designs}

May 2, 2012

It’s spring cleaning season and I am cleaning up things around here and making Cantaloupe Corner all fresh and new. A little while back I was looking over my blog and thinking. . . “bleh, I need a makeover, and I know this rockin’ awesome girl I went to college with that does graphic design. I need her. . . bad.” So, long story short, me and Erin from Eedee Design Studio got together and she created our fresh new look! Isn’t she the best? 

LogoJPG

She found a way to incorporate the orange and green colors and she turned the o’s into cantaloupes. Cute huh? Just don’t stare at them too long or they start to look like amoebas. (Or maybe I just had too much caffeine today.)

If you need a blog makeover or a new logo or any other graphic design stuff, check out Eedee Design Studios. Her designs are sweet and memorable, and she really works with you to make it just what YOU want. I was really impressed with how easy she was to work with and how she made sure I was completely happy with my new design. 


And along with our new look we also just added a bunch of new designs to our shop! YES! New stuff makes me so happy!

Not only is it brand new but we are going completely out of the box here and adding C-O-L-O-R!

That’s right, COLOR! I have found the most amazing way to print these shirts in color while still keeping them lead free, and super duper soft. Trust me, it’s pretty amazing. I’ve been working on this new technique since about 6 months ago and I finally have it perfected and ready to make for you.

Here’s our newest members of our CC family!

Splatter Number- Toddler Birthday shirt.  This is a 2 tone color printed tee with your choice of number in the center. 1,2,3,4,5,6,7. We now have Navy shirts up to size 8!

Teach Me – Toddler T-shirt. Green or Navy Blue with Yellow distressed words.

This was inspired by my kids. I’m a work at home mom and life gets really stressful with 3 little ones running (or crawling) around here. I’ve adapted a motto that I have even taught to my kids. It is “Don’t get mad, teach.” This is my little reminder that when I’m about to get angry or lose my temper those are the best teaching moments. Take a breath, look at the situation and teach them how to make it better. This shirt also is a great reminder that we need to be teaching our kids all day long every day. Teach them to read. Teach them about the world. Teach them to love.

Girls Typewriter Number Shirt- Toddler Birthday shirt , available in Purple with aqua blue number or Fuchsia with cream number.

I wanted to bring in some simple and fun birthday designs for da girls! And there are more girl designs in the works!! So keep checking back to see what’s new!

Girl's Vintage Applique Number Shirt – Toddler Birthday shirt  '

Girl’s version of our popular applique tee. The fuchsia and orange are bright and cheery with just the right amount of vintage to make it super fashionable for the little birthday girl.


Vintage Applique Number T-shirt  -  Kelly Green with Royal Blue number.


Spanish Number T-shirt -  Toddler birthday shirt

Here in AZ everyone there are so many people that speak Spanish. So I wanted to make a fun option available to my Spanish speaking neighbors, or anyone else who wants to mix it up for a Birthday or everyday. This would be a great shirt for a fiesta style birthday party!

That’s what we have going on over here. We also have some more new designs that will be making their grand appearance soon. I can’t wait to show and tell!

Related Posts with Thumbnails

April 30, 2012

Teaming up with Whippy

April 30, 2012

Have you noticed that things here at Cantaloupe Corner are looking fresh and new? We have a new Logo, new blog, and new designs!!! I want to tell you all about it but I have a more important mission for today. The new stuff will have to wait, just a little teensy bit longer.

I was telling you before how Whippy Cake’s Becki is earning money to make a trip to Africa with an organization called Heart for Africa.

Well, I have some EPIC EXCITING news!  Cantaloupe Corner is teaming up with Whippy Cake! oh YEAH!

I have designed some sweet-as-a-cupcake women’s shirts for Becki and all of the proceeds from these shirts go directly to Heart for Africa!

The design features  Africa with the signature Whippy Cake stripes and a heart where Swaziland is, (that’s where she will be going to help) and the inspirational words: Share Hope, Spread Love.

Heart for Africa is doing just that, sharing hope and spreading love to those sweet little children. Watch the videos, look into those eyes of those tiny children that have known more struggles in their short lives that we may ever know. If you can’t go to Africa yourself to help out those sweet little ones, help Becki get there to spread our love to them and to share hope for a brighter future.

Becki also has some exquisite Whippy Cake appliques, head wraps, earrings, and she is always adding new fashionable items to her Etsy shop. And all of the proceeds go to Heart for Africa! Help her out. Make this dream of hers come true so that she can share hope with those sweet kids!

Get clicking!

Related Posts with Thumbnails

April 26, 2012

2 Cool science experiments to do with your kids

April 26, 2012

I have this boy. He is kind of a genius, for a 5 year old. I’m way biased because I’m his mom but he really is a smarty. His latest venture is anything involving Science. Earth science is his fave. He is fascinated by volcanoes, caves, rocks, earthquakes. . .

We took a trip to Carlsbad Caverns in November and he was in absolute heaven. He ogled at the massive cave formations and spouted off random cave facts to anyone who would listen. Even I was like “Whoa! Where did you learn all this stuff!” 

I’m a proud mom.

When we have free time at home between school, meals, games, and homework, we love to do science experiments!

Here were a couple of our favorites we have done:

Experiment #1: Oobleck

A lesson in states of matter and surface tension.

-1 part cornstarch

-1.5 to 2 parts water

Mix these ingredients together.  Add more water or cornstarch to get the desired consistency. You can also add a few drops of food coloring if you want. Ours started out really wet and drippy and it made a huge mess but our boys had a BLAST getting dirty. Wait, only one boy got dirty. Ry didn’t want his hands to get messy so he dipped in one finger and then washed his hands and didn’t want anything else to do with the oobleck.

January 2012 012January 2012 008January 2012 010

We talked about how the oobleck went from liquid to solid and back to liquid. We also experimented with the surface tension by punching it! It’s a great stress reliever.

I finally had to drag Simon away from the oobleck once he was covered in the stuff and it was getting dry and crumbly. It is so fun and since it is just corn starch and water it is completely non-toxic and safe. And it sure helps that it is easy to clean out of kids clothes. Simon was COVERED in this stuff. We even had to wash it out of his hair! He played for over an hour before I had to clean him up and send him off to bed.

And if you are up for even more fun with oobleck, you can make it dance!! Seriously! We don’t have a subwoofer to try it out but check out this cool video:


Science is so weird, and amazing!


Experiment #2: The Naked Egg

Our next experiment was learning about chemical reactions. My hubby cleaned his sister’s pool floor with acid and Simon was so interested in how it worked and why the acid made bubbles and bad smells. So I thought this experiment was perfect to answer some of his questions.

January 2012 031

This experiment is: How to remove an eggshell without cracking it.

-1 egg

-white vinegar

-small glass cup or jar

Place the egg in the jar and cover it with vinegar. Ask your child what they see happening when you put the egg in the vinegar.

January 2012 034January 2012 035

Bubbles! The acidic vinegar is reacting with the eggshell.

I’ll let him tell you all about it.

Here’s what’s happening: The acetic acid in the vinegar breaks down the solid calcium carbonate that make up the egg’s shell. When the calcium carbonate breaks down the calcium ions are now free and the carbonate goes into making carbon dioxide, which are those little bubbles that you see all over the egg.

Let the egg sit in water for 24 hours and then carefully remove the egg and replace the old vinegar with fresh new vinegar. Let it sit for another day or 2 and then you can carefully rinse of the egg. Be gentle. Once you have all of the shell off it will look a little something like this:

January 2012 050January 2012 047

If you hold it up to the light you can see the yolk inside. Pretty cool, right?

January 2012 045

I wish I had photos of all of the fun experiments we do together. I have a budding scientist on my hands!

Related Posts with Thumbnails

April 23, 2012

Chewy Plum Granola Bites recipe

April 23, 2012

Plum bites

. We all know that dried plums are called prunes. Prune is one of the ugliest words in the English language. It sounds like old, smelly, flatulent food that grandma ate to “stay regular”. Ok, now wipe that image from your mind (if you can) and embrace your inner granny! Prunes are just dried plums. That’s it. Really. They are like raisins, only bigger. They don’t smell, and it’s not just grandma that eats them. They are sweet and delicious and so good for you.

Prunes are good for your heart and bones and they can help you stay skinny because they are loaded with fiber and they keep your stomach full longer. Did I mention they are sweet and delicious?

Here’s a quick, easy, pick-me-up recipe for those yummy little dried plums (I still can’t bring myself to say “prunes”.)


Chewy Plum Granola Bites

1 C Prunes (a.k.a. dried plums)

1 C Rolled oats

1 Tbs. Fruit Sweetened Jelly (I used Polaner raspberry jelly but you can use whatever flavor you like.)

2T Almond Butter


Directions:

Put it all in your food processor and process it until it either all sticks to the sides and you can’t process it anymore (that’s what happened to me in my Ninja), or if your processor is better than mine you can mix it as long as you like. This recipe probably won’t work in a typical kitchen blender.

You may want to cover and refrigerate it for 30 minutes to make it easier to work with. I’m a lazy cook so I skipped this step.

Form the mixture into small bite-sized balls.

Eat, and be healthy!

Store leftovers covered in the fridge. These should keep for quite a while, about 2 weeks or more.

plum bites 2plum bites 3

Related Posts with Thumbnails

April 16, 2012

Beet Berry Smoothie recipe

April 16, 2012

We used to grow beats in our garden when I was a little girl and I remember loving them. We even sautéed the beet greens like spinach and ate them with vinegar. It has been quite a while since I thought back on these memories because my family never eats beets. Not that we don’t like them. They are just one of the foods that have been forgotten in our household.

Now I have a recipe that is bringing beets back!

april 2012 009  april 2012 020

Why beets? These deep red root veggies are known to be blood purifiers, blood builders and they help in the creation of blood cells. And if you have beet juice everyday it can even bring down your high cholesterol (source). They also contain folate, vitamin C, and potassium, iron, magnesium, niacin and more vitamins and minerals! The beet greens also contain anti-oxidants, and vitamin A.

In other words, beets are a nutritional powerhouse! They have a sweet earthy flavor that fits perfectly into our new smoothie recipe. The health benefits in this smoothie go beyond beets too. There’s blueberries, bananas, orange juice, raw honey . . . Healthy tastes so good!


Beet Berry smoothie

Beet Berry Smoothie

1/3 C Chopped beets (raw)

1/2 C Orange juice

1/2 Banana

1/2 C Frozen blueberries

1 tsp. Raw Honey

1/4 C Silk Coconutmilk (or milk of your choice)

2 or 3 beet green leaves or small handful of Spinach

april 2012 007

Add all ingredients to a blender of food processor and blend for about a minute or until smooth.

april 2012 010april 2012 011

april 2012 012

Raw honey can be pricey but it is worth the investment in your health. And I think it tastes so much better than pasteurized honey.

april 2012 018

Enjoy!


The beets will probably turn your hands pink for a day. And don’t freak out if you have pink pee for a day or two. (Sorry if that is TMI but it can be shocking if you don’t expect it.)

This recipe was so yummy my little 3 year old finished his cup and asked for more! This one’s a keeper!

Related Posts with Thumbnails

April 13, 2012

Before and After : Wall Stencil

April 13, 2012
We have been living in the same house for almost 8 years now. 8 whole years! It seems like we just moved in a year ago. Ever since the first day we moved in we had been planning on painting the interior of the house. We have painted our bedroom twice, and just about every other room in the house. We even did our boys room in lime green!
And now, 8 years after we talked about painting the living room I finally made it happen!
Here is the terrible before picture. In all of it’s messy pre-construction glory! Yowzah!
January 2012 026_thumb[2]
We picked out a pretty khaki grey called Stonington from Valspar. It is light enough to keep our room from looking like a cave since we don’t have a lot of natural light in this room, and it adds richness and warmth. It’s the perfect mix of grey with a little bit of tan.
Related Posts with Thumbnails

April 10, 2012

German Chocolate “Green” Smoothie

April 10, 2012

april 2012 005

I’m in the last week of an 8 week health challenge. My sisters, brother-in-laws, and few others have been in on it too. It is a whole life health challenge and the absolute hardest part of this challenge is that we aren’t supposed to eat sugar. No Oreo cookies, no candy bars, no Easter Cadbury Mini Eggs!! The first 2 weeks I had to give all I had to keep from diving in to the little bag of peanut butter M&Ms I had “hidden” from myself in the freezer. All of the other junk food was banished to the garbage can or the garage so I wouldn’t be tempted to eat it. Out of sight, out of mind. kind of.  I just couldn’t talk myself into throwing out perfectly good peanut butter M&Ms.

Finding ways to calm my sweet tooth has been oodles more fun that I thought it would be. I still limit sugars in general as much as I can (including all artificial sweeteners and some natural sugars) but when I just can’t say no I have found that a nutrient rich sweet treat is 100 times more satisfying than that frozen bag of M&Ms.

Since green smoothies are my new love I thought I would shake it up a bit (pun intended) and make it CHOCOLATE! Because inside the new healthier me there is still a raging chocoholic that I have to please.

april 2012 004 copy

German Chocolate “Green” Smoothie

1 banana

1/4 C. Coconut flakes

1/4 C. Walnuts

1 1/2 C. Spinach

3 T. Unsweetened cocoa powder

2T Real maple syrup  (or honey)

3/4 C. Milk of your choice (I used Silk Coconutmilk)

1 C. Ice


Put it all in your blender/food processor (mine is a Ninja) and blend until smooth. (The coconut flakes take the longest to blend up.)

Add more ice if desired.

april 2012 007 copy

The spinach, walnuts, and coconut and super foods packed with healthy fats, vitamins and minerals. The banana not only makes this smoothie sweet but it gives you a potassium boost. And we all know that a little chocolate can be good for you too. It has cancer and age fighting antioxidants. (yeah baby!)

Fight wrinkles and cancer and get an energy boost, all from a yummy German Chocolate “milk shake”? yes please!

Want more healthy yummy smoothie goodness? Check our Lemon Colada Smoothie, and my favorite Super Power Green Smoothie.

Related Posts with Thumbnails
 
Blog Design by Eedee Design Studios