Showing posts with label photography. Show all posts

March 29, 2011

My new favorite photography toy!

March 29, 2011
I've had my semi-fancy Canon Rebel XT camera for almost 2 years now and I still have no idea how to unleash all of it's awesome capabilities. I'm a wanna-be photographer who hasn't had the extra time yet to take a good photography class. I have learned a ton from library books, websites, and photography blogs but there is always truck loads more information I want to cram into my brain.

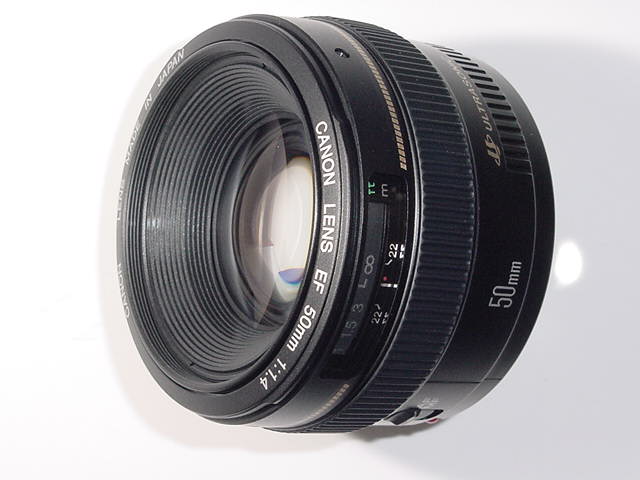
One item that kept popping up all over the web labeled as a great tool and an inexpensive way to amp up your pics is this baby:  a 50mm Canon lens.


It's a small lens that packs a big punch!

After drooling over it for a long time I finally bought mine! At only about $120 it's an investment that won't empty your pockets.
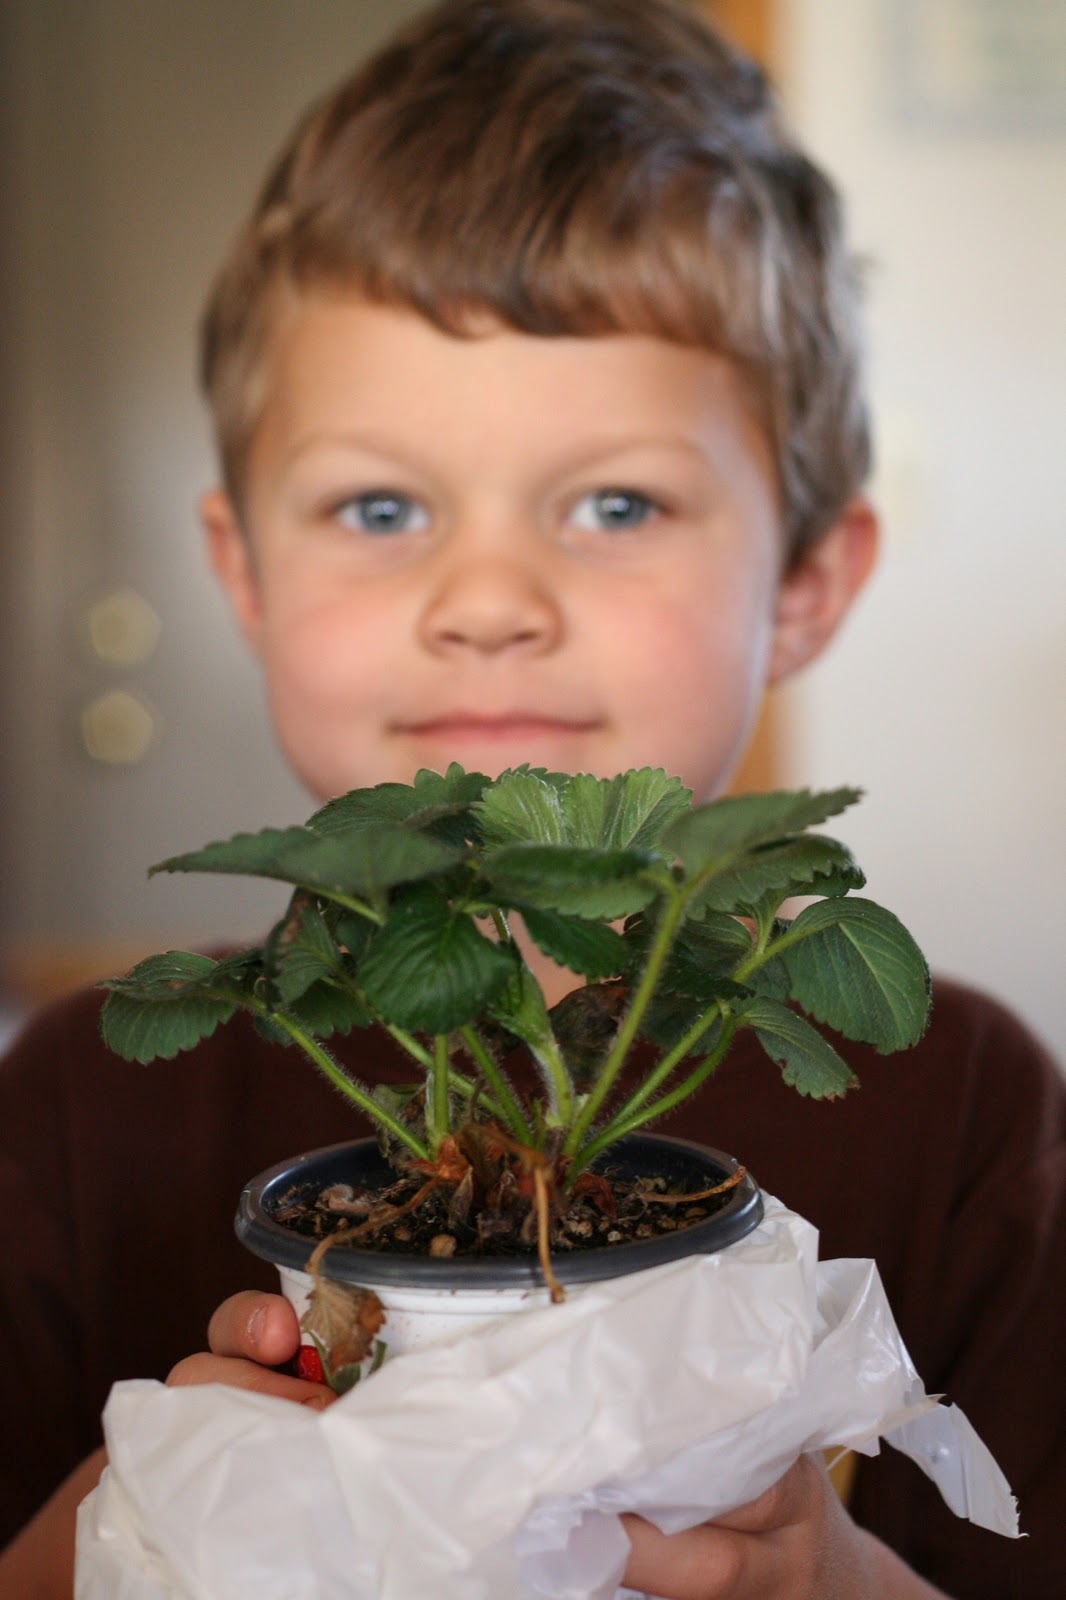
 I just got mine in the mail last week. Holy monkeys! I can't tell you how excited I am to use this lens for my next Cantaloupe Corner photo shoot! It creates that nice blurry background that takes a picture from amatuer to professional in a single click.
My hubby thinks I'm a little crazy. The first time I tried out my lens I got so excited and started spouting out photography vocab like "aperature" and "ISO", words that I barely understand myself. I was seriously excited about the f1.8 aperature!
Here are a few random shots taken with the new lens.


I am sooooo digging the blurry backgrounds. 


This is Zues, he is our loyal mini Schnauzer. He loves to pose for photo ops.


They say that a good camera (or lense) is like an artist's paintbrush. Having a good camera doesn't make you a fantastic photographer but it can definately make a difference.

Now to practice with my new paintbrush!

Related Posts with Thumbnails

March 4, 2011

Simple Photo Tips for your Etsy Shop

March 4, 2011
The most intimidating part of opening an Etsy shop was pulling up Etsy's front page and seeing the GORGEOUS pictures that grace the front page. Wow! I thought that everyone must have hired a pro photographer because my pictures looked absolutely nothing like theirs.

Without the budget for a pro, I picked up some books at the library and checked out some photography articles on Etsy. And I realized that (surprise!) most of the artists actually do their own pictures too!

But all I had was a puny little camera. Not one of those fancy things with the big ol' lens that you see real photographers with.

Turns out, all you need is a decent camera and a little bit of know how. Sure the big fancy cameras are nice but your camera is just a tool. It is like an artist's paintbrush. Just owning a nice camera doesn't make you a great photographer. You just need to know how to use what you have.

I am no professional, but I have learned a few tips and tricks that have vastly improved my Etsy shop photos. Hopefully these will help someone out there that is having the same problems I did.


Tip#1:
The best tip I have learned thus far is use natural light whenever possible. PLEASE, don't use your camera's flash! It messes with the colors and shadows and always makes the photo look dark and dingy. Take your items outside or near a window and use the power of the sun! Also, try to avoid direct afternoon sunlight as it creates harsh shadows and can sometimes mess with the photo colors. I take pictures out on my covered porch in the mornings between 8 to 10.

Tip #2:
Keep it simple. Don't clutter up your backdrop. Your customers' first impression is going to be from a small thumbnail photo of your amazing item. They need to be able to see it clearly and know what it is. I stick to all white backdrops when I am photographing just my t-shirts or onesies. A sheet of white foamboard is perfect! Just don't let little sticky fingers find your favorite white backdrop.
I have also seen some beautiful photos with simple patterns and props in the background, like this one from jacaranda designs.


Tip #3:
If you are selling an item that someone will wear, modeled shots are fantastic to have. When I am shopping for my boys, I want to see how something is going to fit them before I even think about buying it.  Find a model and backdrop, and some natural light and take some action shots of your items. If you are photographing children, get down on their level. Make sure the modeled item can be seen clearly in the photo.

Tip #4:
EDIT! Edit! EDIT!
The greatest part about digital photography is that you can take as many pictures as you want, keep the good ones and delete the bad ones.
 Take your favorite shots and put them into a photo editing program such as Photoshop. I don't have "Photoshop" but I use 3 different programs to get the exact image I want.
1.Google's free editor is called Picasa. It has limited editing features but most of the stuff you really need to do can be done in this easy to use program. I use this program to crop, straighten, brighten, and saturate the colors in my photos.
2. If you want to take it a step farther, try http://www.picnik.com/ . This is also free to use and has lots of simple editing settings to make your pictures look amazing. 
3. And the last program that I use is GIMP.  This is an amazing FREE photo editing program that has many of the capabilities of Photoshop. It takes some time to get to know the program because it is so versatile but it is totally worth it. This program is great for major photo editing and creating images such as shop banners and avatars.


My normal everyday photo edits include cropping and playing with the exposure and contrast in my photos. These simple things can turn a "sorta good" photo into a "wow!" photo.


Before:


 After:


Before:

After:

Happy photo snapping!
See more great photo articles in Etsy's Guide to Photography.

Related Posts with Thumbnails

May 29, 2010

Can you handle it?

May 29, 2010
With all the arrival of our new premium quality t-shirts I thought it only fitting to get some new pictures that are just as. . . well. . .premium.

Eric Greer from Eric Greer Photo was the man behind the camera. And HOLY COW! Words can't even describe!

And you've got to hand it to a guy that is willing to chase toddlers/preschoolers around to get some good shots. It's not easy.

Here are a handful of my favorites:

Can you handle the cuteness?
ROCK 
Little Mister
Beat It

Definition of a Boy

Dig It

 Check out more new pics in my shop!

And. . .

I've got a new design or two coming up after the holiday weekend.


Eric Greer also does family, engagement, and wedding pictures. I LOVE his style! You have to see his work!
Check out his portfolio here.
 And his Blog.

Related Posts with Thumbnails

May 6, 2010

Vintage photo tutorial with GIMP

May 6, 2010
Have you heard of GIMP? It's an AMAZING free photo editing software! Yes, I said FREE! No strings attached!
For any of you that already have it here's a simple tutorial to vintage-ize a plain photo.  This will also work with PhotoShop but you will have to do some translating because I don't know PhotoShop lingo.

1. Choose your picture and open it in GIMP.


#2: Under the "Colors" tab, choose "Hue-Saturation". I took the saturation down to -39 to make the photo look faded.
#3: Find a great texture pic, or take a texture picture of your own.  I found this great wood texture pic.


#3: Open a new layer and copy and paste the texture pic (or if it's your own picture, open as a new layer.)

#4: Stretch or shrink your image to cover the entire original picture.

 #5: Choose the "Mode" of your layer to play with the texture effects.
You can find the Mode at the top of your right hand dock window. It's a pull down menu.
Try some of these effects:

If the effect is too dramtic, tone it down by lowering the opacity.

Choose your favorite effect and make something amazing! 
I also added a vignette using Picnik.com (another FABULOUS free service).

So easy, and there is no need to buy expensive programs.
To get GIMP, Click here, or go to http://www.gimp.org/

Photobucket
Related Posts with Thumbnails
 
Blog Design by Eedee Design Studios