September 15, 2010

Sacrifice vs. Giving

September 15, 2010
Life changes so rapidly. Yesterday I was 16 and getting my drivers license and going to the homecoming dance with the football player I am now married to. Today I am driving my oldest son to preschool and teaching him how to write his name.

Being a mother is the most wonderful and difficult job out there. We have the important job of sacrificing of our time, energy, skills, (not to mention boat-loads of sleep) for these beautiful beings that God has entrusted into our care.

Then it hit me. 

Sacrifice? This isn't sacrifice!
I willing give my time, energy, skills, and sleep to my kids.  The word sacrifice is all wrong. It emphasizes that we really don't want to do it but we have to so we do it anyways.

The correct word is . . . Give

We give of ourselves to make their world a better place.


Giving is not just for the other person.  I have been taught this principle in church and at home my entire life but it never really sunk in until this past year.
You give to others to help them, and in the process you help yourself also.

It is amazing what giving can do to your physical, mental, and emotional health.

In a talk I was listening to today the speaker said that giving has Scientifically been proven to help you live longer. It also makes you a happier person.  AND, get this. . . . It is the worlds best diet plan!!


Yep, giving to others can actually help you lose weight!

Makes sense right?  We eat when we are upset, bored, sad, lonely. . . (at least I do)
When you are giving of yourself you rarely experience these emotions.  That's where the happiness kicks in.


I  have been touched by the lives of others who have served me, and those who have been my examples (Thanks Becki). 

So who's with me? Couldn't we all use some more happiness in our lives?
Let's give back in any way we can.  Volunteer, join a good cause, or even better : help your family, friends and neighbors! That's the best place to start.

My first order of giving. . .  Making bread for unsuspecting neighbors.  Photobucket
Related Posts with Thumbnails

September 9, 2010

Now it's Personal!

September 9, 2010
We celebrated Little Monster's b-day last week and I printed his very own personalized Choo Choo I'm 2 shirt with his name on the back!  And I added embroidery thread stitching on the sleeves and hem. (inspired by I am Momma Hear me Roar!)

I've been waiting SOOO long to use this design for my own kid!


I love the name on the back so much that I wanted to make personalized shirts available to you too!
 Oh Yeah!
You can have your child's name stencilled on the back of the shirt using this unique technique that makes it look distressed and faded.
It is also done with our gentle dye remover. No ink and no paint!

Just add this item to your cart along with the shirt you want to personalize.
(Perfect for birthdays!)


________________________________________________________________________________

For Ry's birthday I got to give my craft cutter a workout. But I thought it would be fun to make personalized invites for his party!


 I searched frantically though the internet to find the perfect train cupcakes and found nothing! So I had to improvise.
I cut cream cheese candies into cute little trains to top off the cupcakes. A little green grass and orange sprinkles and voila! you have Choo Choo cupcakes!
I'll have to share the cream cheese candy recipe! It's super easy, fun, and YUMMY!


Mmmmmm!


I also made a train pinata for the party. It is made out of cereal boxes, an oatmeal canister, a toilet paper roll, tissue paper, tape, and TONS of CANDY!!!!
After all my hard work on this thing I didn't even get a good picture. I guess this isn't one of those "I'll get pictures later" projects, because now it is smashed into pieces in a trash heap somewhere. But it was fun while it lasted! The kids were in candy heaven.  :)


Here's a picture I snapped while we were in the White Mountains for the party.
 It was so beautiful I had to share.

Have a sunny day!
Photobucket
Related Posts with Thumbnails

August 28, 2010

Momma Go Round - Giveaway

August 28, 2010
Most of y'all have probably sent your school-aged kids off for the first day of the new school year. You may have diligently searched every store for deals and steals on hip new clothes and shoes to send your kids to school in.

The older brothers and sisters are all decked out in their new school gear, now it's time for pre-school shopping!

Dress up your toddlers in some new duds.


Today Momma Go Round is starting a round of features and giveaways for all of your back-to-school needs. And not just for toddlers. (Even though we really really love toddler clothes!)


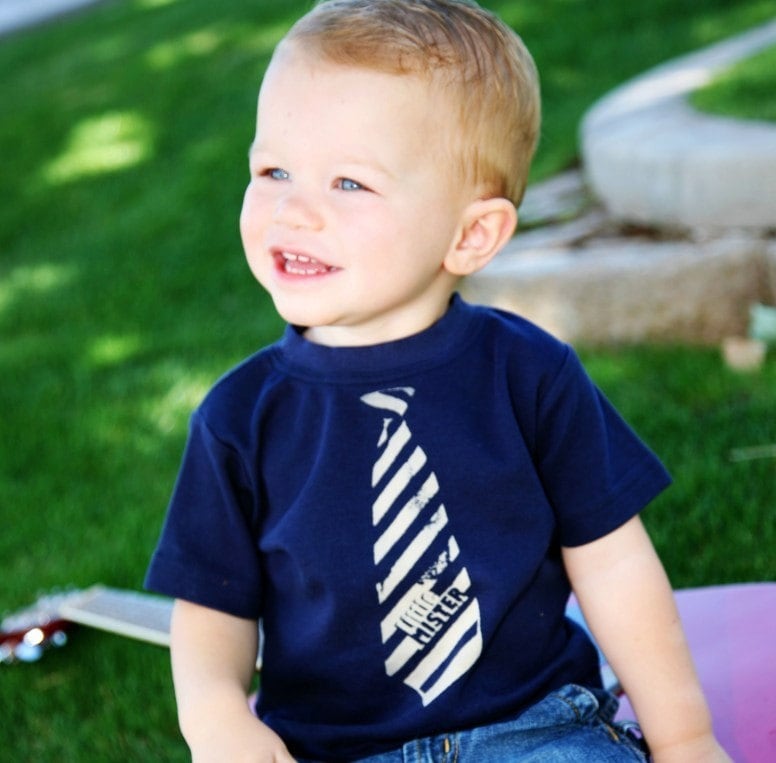
AND Cantaloupe Corner is giving away a "Little Mister" toddler tee! Check out the Momma Go Round blog to enter.    Now your little guy can get all dressed up for his first day of preschool.


And. . . there just might be a coupon code for our Etsy shop.

:)


Photobucket
Related Posts with Thumbnails

August 25, 2010

Doily - licious

August 25, 2010
Remember how doilies used to get a bad rap for only hanging out in old folks homes or only coming out at Christmas time?

The doily is back and they are everywhere.

(And I suddenly have the desire to put them on everything. )

This morning, How About Orange put up a collection of simple  doily projects. I am in love with all of them and I am pretty sure that I need to go buy some more doilies today.

I am in love with this one in paticular from TidyMom.net :

Doily stencils? How cool is that?!
The whole tutorial is available here.


Need some more doily awesomeness? How about something for your naked kitchen table.
What better way to dress it up than with doilies!

I know what you're thinking. You have to have one!
Go hit up your grandma, or local yard sales for some vintage doilies or pick some up at your neighborhood craft store and get the tutorial here.


Photobucket
Related Posts with Thumbnails

August 18, 2010

Magnet Board Re-do

August 18, 2010
Like many of you, I get a rush out of treasure hunting at yard sales.
My husband has learned that I never really like anything until it has been painted at least once.
Spray paint is my dear friend.

This week's treasure hunting trip landed me with this beauty.
The paper was warped and someone must have used it for a candle holding table tray because there was a huge wax spill on it.
I adore the glass drawer pulls. So vintage.
The nautical paper had to go. I scraped off the seagulls and starfish off the metal backing and painted the frame matte white.

Then I added some cute yellow fabric and trimmed with black ribbon.

I am using it for my kids who are 2 and 4. We have the letter of the day and the word of the day.

This was also my solution for my son using up all of my scotch tape to hang up his drawings of trains ALL over the house! You should see my collection hanging in my studio, whoa! I love them but . . . you know, after the 30th picture of the same thing. . .

So now he has a magnet board to display his very favorite pictures.

:)


Photobucket
Related Posts with Thumbnails

August 13, 2010

{ Reconstruction }

August 13, 2010
I just finished this shirt for me. It has a screenprinted tree, shabby reverse applique birds, and lace trim around the neck. It was so fun to make and I want to make more!
I have a bunch of leftover blank women's tees in my studio that I don't have in my shop. Should I venture into the world of reconstruction? Yes? No? 
Just a thought.


Photobucket
Related Posts with Thumbnails

August 11, 2010

Squeaky Clean Place Mats - Easy Tutorial

August 11, 2010
Squeaky Clean Kids Placemats


What do you need?

Fabric and Thread-preferably sturdy cotton
Clear plastic/vinyl  (You can use an old shower curtain, or pick some up from Wal-Mart or your favorite fabric store. It is sold on gigantic rolls. The thinner vinyl is easier on your sewing machine.)
Scissors, Pins, & Sewing Machine


 1. Cut your fabric to the size of your placemat + 1/2 inch per side for seam allowance. I wanted a 12 x16 mat so I cut my fabric to be 13 x 17. You need 2 rectangles of fabric and one of vinyl.

 2. Layer. Sandwich the vinyl between the fabric. Right sides of the fabric go inside.

 3. Pin your layers together to prevent them from slipping.


 4. Sew the edges,  leaving a 4 to 5 inch opening on one of the sides.


 5. Trim the edges and corners.


 6. Turn right side out.


 7. Tuck and pin the opening so it matches the other sides. Top stitch all the way around, close to the edge.


Easy, right?   Now go make some more to match!

Easy to wipe clean when your kids get them messy. And when they get really messy, handwash and air dry.

Before you sew your layers together you can add appliques, patchwork, names, or whatever you want to the top layer.  

 I kept mine simple, but the possibilities are endless!


Photobucket
Related Posts with Thumbnails

August 9, 2010

{ a bird with a french fry }

August 9, 2010
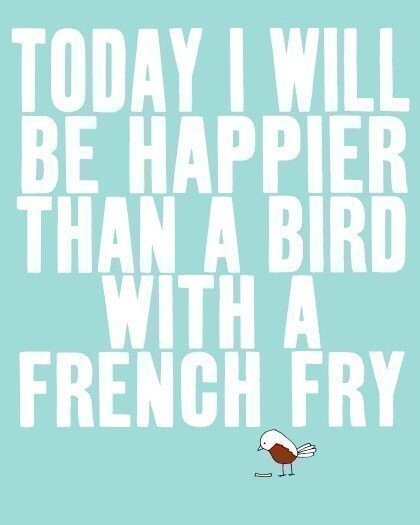
(print by dazeychic)

Just looking at this print makes me happy.    :)


Today I promise myself to be happier than a bird with french fry.
I will try to make someone else's life better because that will make my life better.
Today I will smile at someone I don't know.
I will do something extra to make my husband happy.
Today I will play with my children until we laugh so hard our sides hurt.

Today I will be grateful for all that I have been given, because I have been given more than I could ever deserve.

Today I will spread love.

Today I will give a bird a french fry.

Photobucket
Related Posts with Thumbnails

August 2, 2010

H-H-H- Happy Birthday!

August 2, 2010
A very merry Un-Birthday toooooo you!
(unless today is your birthday. Then to you I say Happy Birthday!)

As I mom, I know how much fun it is to plan out our  kids' birthdays!
Family, friends, activities,  cake, ice cream, games, pizza, and cute outfits.

For my son's birthday this year he turned the big 4.  We planned out our day full of adventure and I just had to make a shirt for him so EVERYONE would know it was his big day


I was so amazed at the love he recieved all day long! Everywhere we went he got smiles and "Happy Birthday" wishes.  And at lunch at Red Robin, we didn't have to tell our server it was his birthday.  She automatically brought out the festive, and free, cup of celebratory ice cream sundae.

Gotta love free ice cream  :)


I just put his "Birthday Boy" t-shirt , (which BTW he helped me design) into our Etsy shop, along with a new "Birthday Girl" design.

Birthday Boy shirt
Birthday Girl Shirt
These tees come in different colors, and come in sizes 12m to 6y. I can also print them on bigger sizes, just email me or contact me on though our Cantaloupe Corner Etsy shop.

 HAPPY BIRTHDAY to your sweet little tikes!
Photobucket
Related Posts with Thumbnails

July 29, 2010

Speedy: The Rollerskating Turtle

July 29, 2010
I always wanted a turtle for a pet.

My parents didn't think it was a good idea.

We had cats instead. 

Not that I don't like cats. It's just that turtles don't shed, or scratch, or meow at your door in the middle of the night.


 Now I have a turtle and his name is Speedy.
 He may not be real, but he eats a lot less than my dog.

And my dog would probably eat a real turtle.


This is Speedy:  The Rollerskating Turtle


My little monsters love him too.
 
My 4 year old son called him the "funniest turtle I have ever seen!"


Now you can get a Speedy Turtle for your kids too. He's in our shop
He would love a good home with toddlers who can race as fast as he can.


Photobucket
Related Posts with Thumbnails
 
Blog Design by Eedee Design Studios